“Only a fool learns from his own mistakes. The wise man learns from the mistakes of others.” ~Otto von Bismarck
DIY photo mounting can be fun, or a complete nightmare. If you’re doing any photo mounting on foamboard, don’t repeat my stupid mistakes. Get the right equipment, practice with smaller images, and get right into it. I chose to mount on foamboard for my Library exhibit because it sounded like a fun and interesting project – it was definitely interesting, but not so fun at times.
Don’t be cheap.
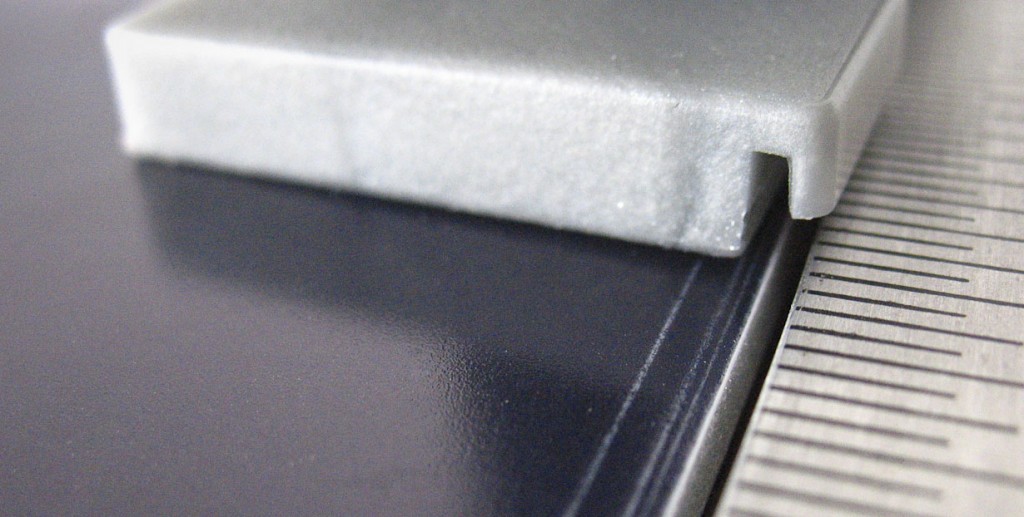
I started with a cheap x-acto knife for testing purposes, thinking it would be good enough – boy was I wrong. Did a little research and found the Logan 701-1 Straight Cutter ‘Elite’ (pictured above). It does 90° straight cuts every time, which will drive you nuts trying to accomplish using a traditional x-acto. Save yourself a headache and buy one.
Also invest in a long cutting mat, I got a 12×36′ mat. The longer the better. Don’t trust the cutter on a cardboard box thinking it will not scratch up your working area.
Also buy a long metal ruler without a cork back. Having a cork ruler will place the ruler over part of the image, slicing off about 1/4 inch of each side. Without a cork, the ruler can be placed against the image and have it align perfectly every time.
Don’t assume your work will be safe.
I watched a video before beginning this project, where the guy mentions using a mat board for protecting your image – do not skip this step. Just remember Murphy’s law: “anything that can go wrong, will go wrong”. So protect your work at all times, don’t learn the hard way like I did.
After scratching my image, I used bristol board and it did the job perfectly. It may have been the straight cutter that caused the scratch, but I also believe the image was not great quality either – more on that below.
Don’t use a photo lab you don’t trust.
I was curious about a new lab I heard of recently, which I won’t name because I don’t feel like getting sued. They were more expensive, but the turnaround was fast, so I decided to give them a shot. I feel like I’ve been cursed with that photo. Almost every issue I had in this post involved that image.
I emailed the lab asking about their paper and printing process, and they insured me they use only the best quality paper from Germany and best quality HP inks. I can’t say the print looks bad, because it does look good, but there must be something in the process that makes the paper more sensitive and prone to scratching.
I have done a lot of printing another lab, and have never run into the same issue. I even tested by putting all my muscle into reproducing the scratches on other prints, which didn’t happen even once.
Spray adhesive: Less is NOT more.
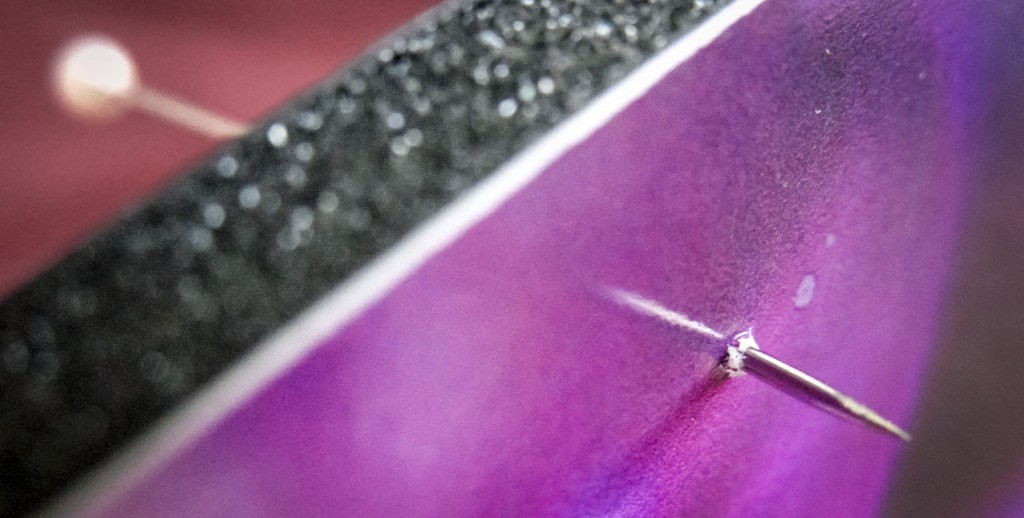
During my first mounting I thought I used a bit too much spray adhesive, so the second mounting I used a little less. A few days later, I noticed air bubbles on the image. Always use a generous amount of adhesive, or else you may fall victim to air bubbles if your foamboard warps at all.
Solution: Poke a hole into the back of the foamboard where you see the air bubble, with a sewing needle, but stop just before you reach the photo. Flip the board over, get a clean rag, and wipe the air bubbles towards the hole in the foamboard – the air bubbles will eventually disappear. Practice this on a scrap foamboard before doing it on your final image. Sadly small air bubbles did pop up afterwards because you can’t respray the board with adhesive, but it still looks better now.
Don’t spray and place.
Do not think you can cheat by putting the image on the ground, spraying it with adhesive, then placing the foamboard on top of the image – you will regret it. Anything you had underneath the print (newspaper in my situation) now has adhesive spray on it too, so guess what, you just mounted some newspaper on your print. Luckily the adhesive did not set, so I had time to remove the newspaper. I did have some adhesive on the print, but it’s not very noticeable, thanks god.
Don’t use foamboard.
Personally I don’t like foamboard, and I would never consider using it as a board for a client. Foamboard is great for projects like this, it’s easy to work with and not too expensive, but the boards do warp over time. I am using it for the exhibit, because frankly, that is what I can afford at the moment (more on this in a future post).
Last but not least…
Don’t give up.
Seems like an obvious one. As much I as wanted to throw in the towel and toss all my supplies off the balcony, I stuck with it and used this as a learning experience. Without trying this project, I never would have known what to do, and more importantly what not to do in the future.
Have you done any DIY photo mounting? If so, what are your tips and tricks? Leave a comment below.
Related Posts
7 Life Changing New Year’s Resolutions I Need To Keep
TIFF 2012
Italia vs Espana